Weven's Planning Portal: Frequently Asked Questions
Frequently asked questions, and their answers!
Table of Contents
Managing Account Users
Q: How do I add/delete a user in my Planning Portal?
A: Click on the settings gear icon at the top right of your account. Select "Add Account User" to generate another user, or click on the trash can icon to the right of a user you would like to delete.

Note: Not all account users have permission to add or delete other Planning Portal users
Q: How do I update the contact information or user permission for myself and others?
A: As the account owner, you can click on the pencil icon next to your name or the other users in your Planning Portal to update names, the email used to log into the account, or the user type.
Other users who are not owners of the account (Admin, Financier or Supporter) can log in and update their own name or contact information, but no other details for themselves or others.
Planning Portal Tools
Q: How do I see all the tasks my venue needs me to complete?
A: When you first log into your Planning Portal, you'll find your venue-assigned tasks organized by due date, with any overdue tasks lit up in red at the top of the page.
You can also navigate to your Planning Checklist by clicking into "Planning Tools" on your main menu and selecting "Planning Checklist".
Click into each task to view your venue's instructions, upload requested details like documents or vendor information, and you'll get a special surprise when complete! 🎉
Q: How do I find my venue's vendor recommendations?
A: Your venue's list of recommended vendors can be found by navigating to "Planning Tools" on your main menu and selecting "Vendor Manager".
Under "Discover Vendors" you'll find the vendors' names, contact information and services provided. Your venue might even include a note about this business for your reference.You can click on "Request a Quote" to inquire directly with the vendor and, if you move forward with booking their services, click "Add to your Vendors" to save this vendor to your event.
All of the vendors you have uploaded into your Planning Portal will be saved to "Your Vendors" for both you and your venue to reference.
Q: How do I manage my event timeline using Weven's Timeline Builder?
A: Your Timeline Builder is a great way to organize and share your event details with your venue and even your wedding website visitors if desired!
Click "+Add Event" to add to your timeline, or select the three dot menu on an existing event to edit or delete that entry.
If you want to share any specific times and locations with your guests, make sure you select "Yes" under "Show on Wedding Website?".
Weven Tip: Many couples use this tool to organize their event down to the minute by applying timeline filter tags under the "Timeline" field. This allows you to organize details for photography, food/beverage, setup/cleanup and more, all in one place!
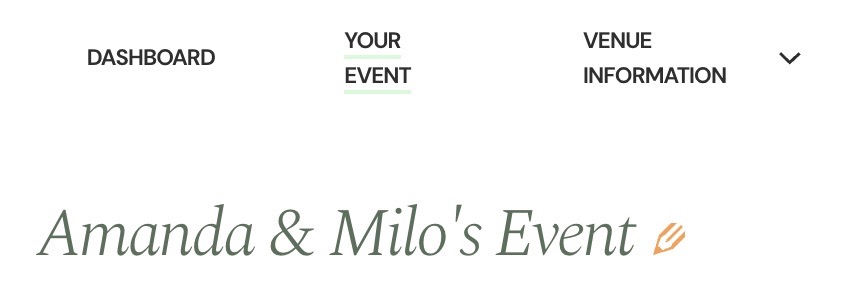
Q: How to I add my Pinterest board to my Planning Portal for my account users and venue host to see?
A: From within your Planning Portal, click into "Your Event" in the top menu. Then select the pencil icon next to your event title (Name & Name's Event).
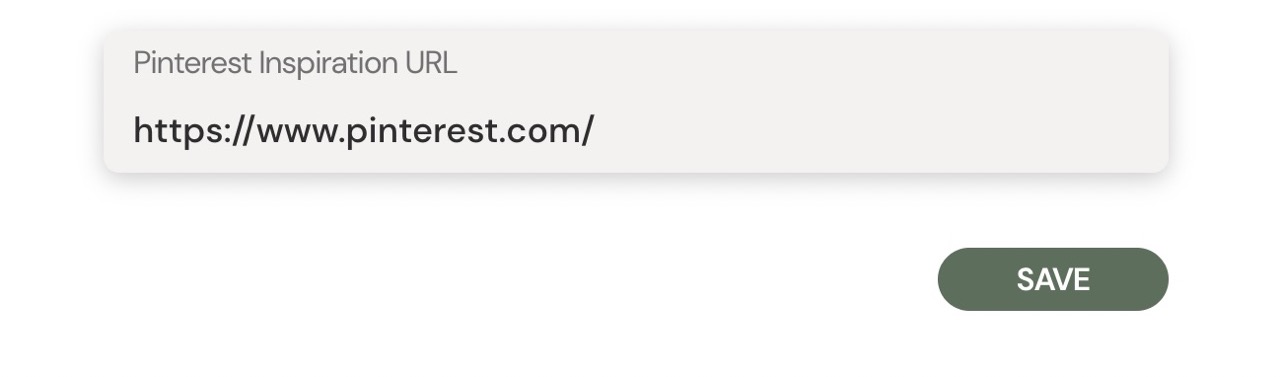
At the bottom of the pop-up window you will see a field to copy and paste your Pinterest link. Hit save and you're all set!
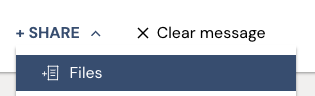
Q: How do I upload a document to share with my venue?
A: Attach your document to a message by selecting "Share" and then "Files". From here you can select the file type, enter a name, and then upload a file from your device. Once attached to the message, hit "Send" to share with your venue!
Another way to share documents with your venue is through your Document Manager. This page consolidates all documents exchanged between you and your venue whether uploaded manually or sent via message. Click "Upload File" to select a document from your device.
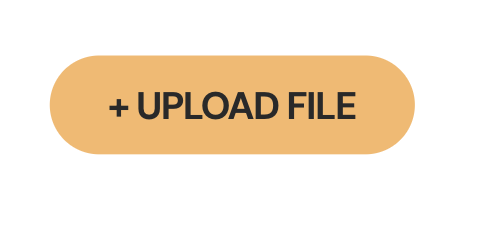
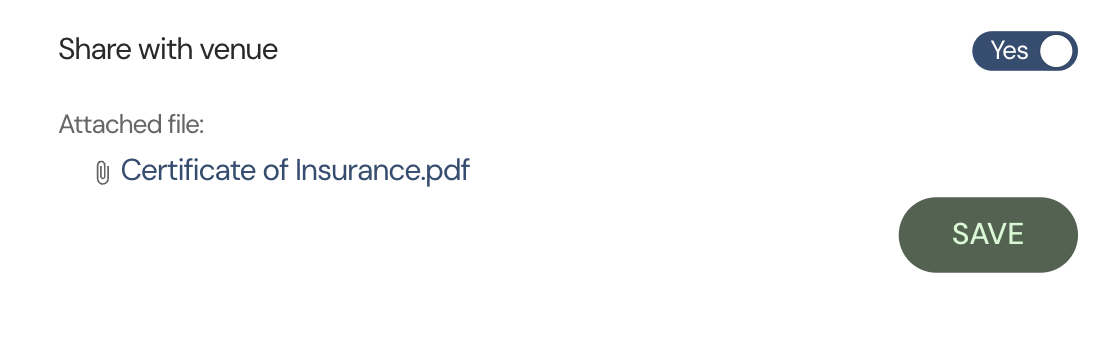
Remember to select "Yes" next to "Share with venue" so your upload is visible to your venue host as well.
Payments Through Weven
Q: I am trying to pay my venue using ACH bank transfer but I don't see the micro-deposit in my account yet. What should I do?
A: After entering in your account and routing numbers it will take, on average, two business days for the microdeposits to reach your account. Keep an eye out, and then return to the payment page to complete the bank transfer!
Q: It says I entered the micro-deposit incorrectly, but it looks correct... what did I do wrong?
A: Make sure the deposits are entered in the order in which they were received - sometimes they way they display in your bank account is most recent first, whereas Stripe will want you to have oldest first, then most recent!
Follow this tutorial for step-by-step support connecting your bank account to Weven.
Q: I only received one micro-deposit. Where is the second deposit?
A: Sometimes the bank puts both micro-deposit amounts under one transaction. Make sure to check the transaction details. If you are having trouble, reach out to Weven Support!
Q: I’m out of attempts to enter the micro-deposits. What do I do now?
A: Reach out to Weven Support! With your assistance, we are often able to complete the verification on your behalf.
Q: Can I complete the requested payment using a different method not listed?
A: The payment methods you see on your payment links are selected by your venue host. If you wish to complete the payment using another payment method, reach out to your venue directly to see what other methods are accepted.
Q: Can I pay a different amount than what is requested?
A: We recommend reaching out to your venue host if you wish to pay more or less than requested on your payment link. Often times they are willing to work with you to determine a payment schedule!
Cheers!
The Weven Team